How to add images to your website?
This step-by-step guide will help you prepare and upload images for your website. It’s detailed because I want to explain the words and terms as well—so that no matter what program or software package users may use, they can still follow along easily!
Let’s begin with… there is file size and file size!
I am aware this will probably sound super confusing, so let me clarify:
– we can say file size and refer to the volume of the file on our hard disk in Kb or Mb.
– or we talk about file size and refer to the actual file dimensions in a unit such as mm, cm or pixels.
Both matter for websites and to control them, we have to work with the file dimensions and file format.
Why is it so important?
Google tracks website speed, and the google gods prefer lightweight pages that load quickly. Images are accountable for 70% of all page weight so image optimisation should be a priority when you work on your website to ensure things go smoothly in search engine land!
Google actually punishes websites that have slow page loads. Not only do your visitors feel sluggish, but so does google! A 3% decrease in loading time can lead to a 3% conversion increase when it comes to online shopping. Convincing enough?
However, of course, it is not only speed that counts, but the quality is also essential. No one wants to see tiny, fuzzy images.
Your images should be as small as possible in file volume but with optimal file dimensions and the best possible image quality.
What is a pixel?
Digital images are made of pixels, px in short. A pixel is a tiny square of colour.
When you zoom in on an image file, you will see the pixels in detail.
Dimension in pixels is the total amount of pixels in the width or height of a file: for example, 1920×1080 px is full HD. This is the same as file dimensions.
When we prepare our images for a website, we take the file dimensions in pixels.
So how do you save your images? Let’s break that down in steps:
- Determine the optimal file dimensions in pixels
- Decide which file format you will be using
- Check the image quality and the file sizes
- Collect and rename your files
- Save your files with the selected specifications
- Make the file size even smaller with an image optimiser
1. How to determine the optimal file dimension in pixels
The best file dimension is as close as possible to the image’s actual size displayed on the website screen. But screens are so different, so this requires a little thinking. You’re probably replacing images already on your website or adding Blog posts. In this case, the images currently in use will have set sizes. If you upload an image bigger or smaller than this, the screen layout is likely to change and adapt to the new image size, this could cause lots of problems.
To find out your current image size:
a. Log in to your website using your Username and Password.
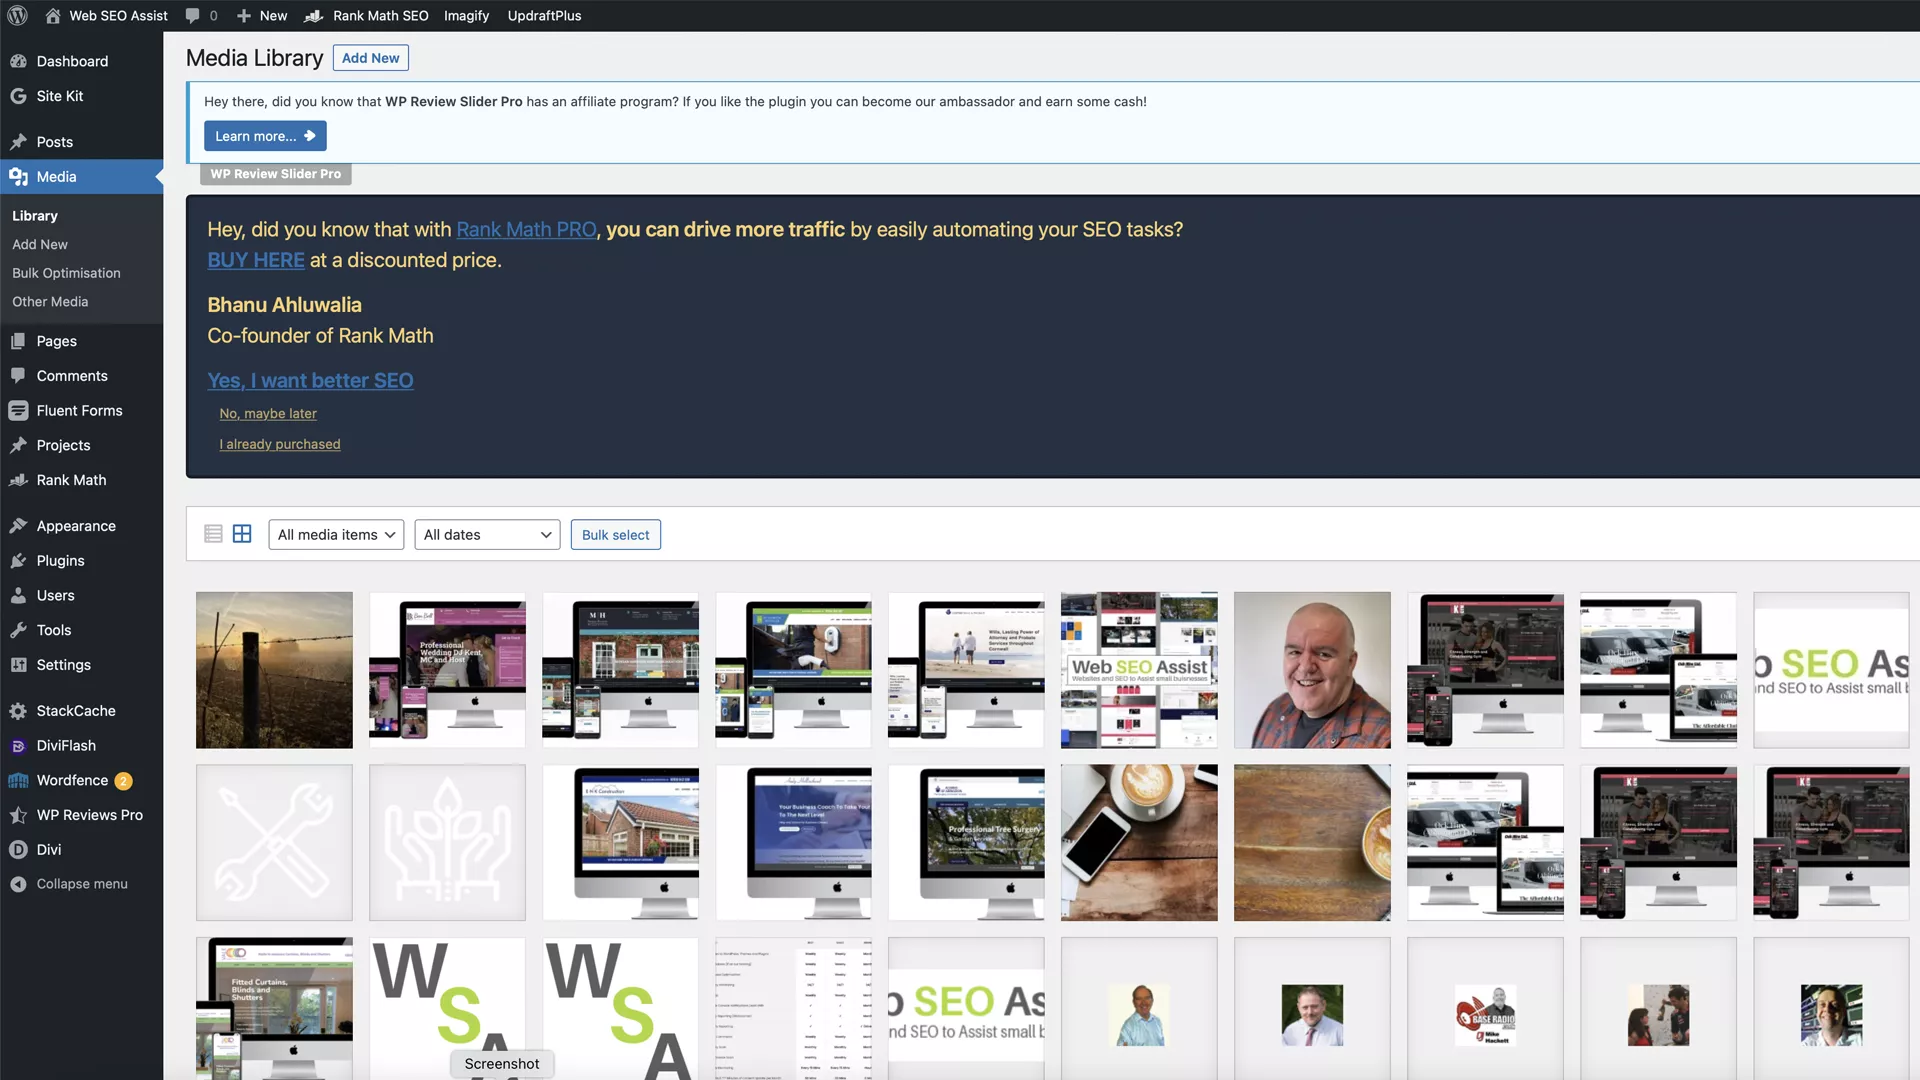
b. Navigate via the left-hand menu, down to Media and then across to Library.
c. Scroll down the page to see all of the images on your website. Take care locating the image you are looking for as the same looking image can be used in different sizes in different places on your website.
d. Click to select your image and in the top right-hand corner, you will see the image details. The last one is Dimension.

2. How to decide what is the right file format
Image files come in various formats, each optimised for a specific use. The most common ones are JPG, PNG and GIF.
The file format will significantly impact image compression (how small the final file is on your hard disk), but there are distinct differences when using specific formats. I will explain them in short here.
JPG
Best used for photography and can be compressed a lot. When you save a JPG, you can choose the image quality.
More compression results in a smaller file but decreases image quality. Be careful not to reduce the image quality to be noticeable.
PNG
When you save an image with transparency, you choose PNG. This format tends to scale better, which is perfect for logos and small graphics. PNG uses less compression than JPG, and you should avoid them for photographic images without transparency.
GIF
Nowadays, we use GIFs mainly in animations. They can have a limited colour palette, which is good for compression, and thus are great for graphics and images with limited colours.
NOTE:
WebP, although possibly used for your original website images, is not included because image optimisation in WebP format is a little more complicated and often cannot be opened or saved in your general imaging software.
3. Check the image quality and the file sizes
If you have a lot of images it may be worthwhile to test and review the quality of your images.
Since the goal is to make your files as small as possible in Mb, you are looking for the jpg compression setting that compresses the file the most without compromising quality. Images with large amounts of details or gradients may require a little higher quality setting.
Images straight off your phone are likely to be around 2.5Mb each and could be as much as 48Mb. Ideally, you do not want images to exceed 300-400 Kb in file size. I know this does not sound like much. But the aim is to keep the size of a webpage under 2 Mb. Anything over that is not advised for page speed. Keep checking those file sizes to avoid images slowing your pages down.
Make sure your images look good and find the files that are still too large to see if you can resize or compress them further.
4. Now’s the time to collect and rename your files
First, collect all files you will be using on your site, and make sure all your images are cropped to the right size.
Proper, descriptive file names using keywords are good for SEO, which carries over to the image titles, so making them informative and useful is good. Google likes dash ( – ) better than underscore ( _ ).
man-with-red-shirt.jpg is preferable to mrdjshi_009.jpg
5. Save your files with the selected specifications
Always save a copy of the original image files before you resize and save with a different jpg setting.
A few things are quite important:
– Avoid upscaling files. If an image is too small, but you need it to be bigger, try to find an alternative.
– Only crop and compress a file once, or your images will decrease in quality.
So if you want to change the file dimensions or jpg settings, go back to the original image files.
TIP: tools for resizing
I have an Adobe Creative Cloud software subscription that includes Photoshop. But, I need to manipulate images all the time, so it’s probably an expensive option for you.
A relatively simple, free, online piece of software you could try is Resizing.app.
I’ve recently been made aware of a, new to me, photo re-sizer from Colorcinch. The link you need is here: https://www.cartoonize.net/image-resizer/ . I’ve had a go with it and it seems simple enough and it’s free! Colorcinch used to be called cartoonize and also offer other free and paid image tools taht may help you out.
6. Make the file size even smaller with an image optimiser
Online tools can compress your image files even more without (or with) quality loss. My favourite is TinyPNG, for super smart PNG and JPEG compression and conversion. You can compress up to 20 images per time for free, and the results are excellent.
Let’s recap this for you so you’ll always know what’s the best file size for images on a website
- First, always use your best, clearest images that go with the text on your website.
- Now determine your images’ ideal dimension in pixels and the correct file formats. TIP: use the old image in your Media Library to find the correct size.
- Perform a test to make sure you are using the best possible setting.
- Collect your image files and give them proper, descriptive file names.
- Save the optimised images. Always save the optimised files as a copy so you never lose the original.
- Finally, you can use an image optimiser tool to make the even files smaller.
Finally
If you get stuck or this all seems way too complicated and time-consuming, you can always ask me to replace any images and make changes for you. I offer Maintenance and Support packages that include a time allowance each month if you are adding photos etc. regularly or, if it’s just a few once in a while, buy a “Bucket of Time” 1hr of my time that you can carry forward for the next 6 months so I can do any extra work on your website for you.
This article is here to help you create great-looking images and faster websites too!
Please get in touch with me if you need help or have feedback or suggestions.
How to add images to a website? is an article written by Stephen Davies of Web SEO Assist.


Recent Comments