First, some helpful articles…
https://www.webseoassist.co.uk/why-have-a-blog/ – A Blog post on why you should write your own Blog.
https://www.webseoassist.co.uk/how-to-write-a-blog-post/ – This Blog post will give you some advice on actually writing the post.
https://www.webseoassist.co.uk/adding-images-to-your-website/ – How to prepare and add images
https://www.webseoassist.co.uk/search-engine-optimisation/ – This Blog post will help you understand a bit more about SEO (you need this for your Blog to work)
Ok, so I’ve written the above blog posts to try and help clients why they should be blogging. If you’re reading this post, then you’ve decided to investigate further and find out what’s involved in the technical side of blogging. What follows is a technical guide about how to actually do it. Hopefully, you should be able to follow along and write and publish your own Blog post. Don’t forget, I’m always here to help you should you need it. Also, if you try all of this and decide that it’s really not for you, but you still want to Blog (it’s definitely worth it) then I offer packages to be able to take your ideas for a blog post and write and publish it for you – get in touch to find out more.
OK, so how do I do it?
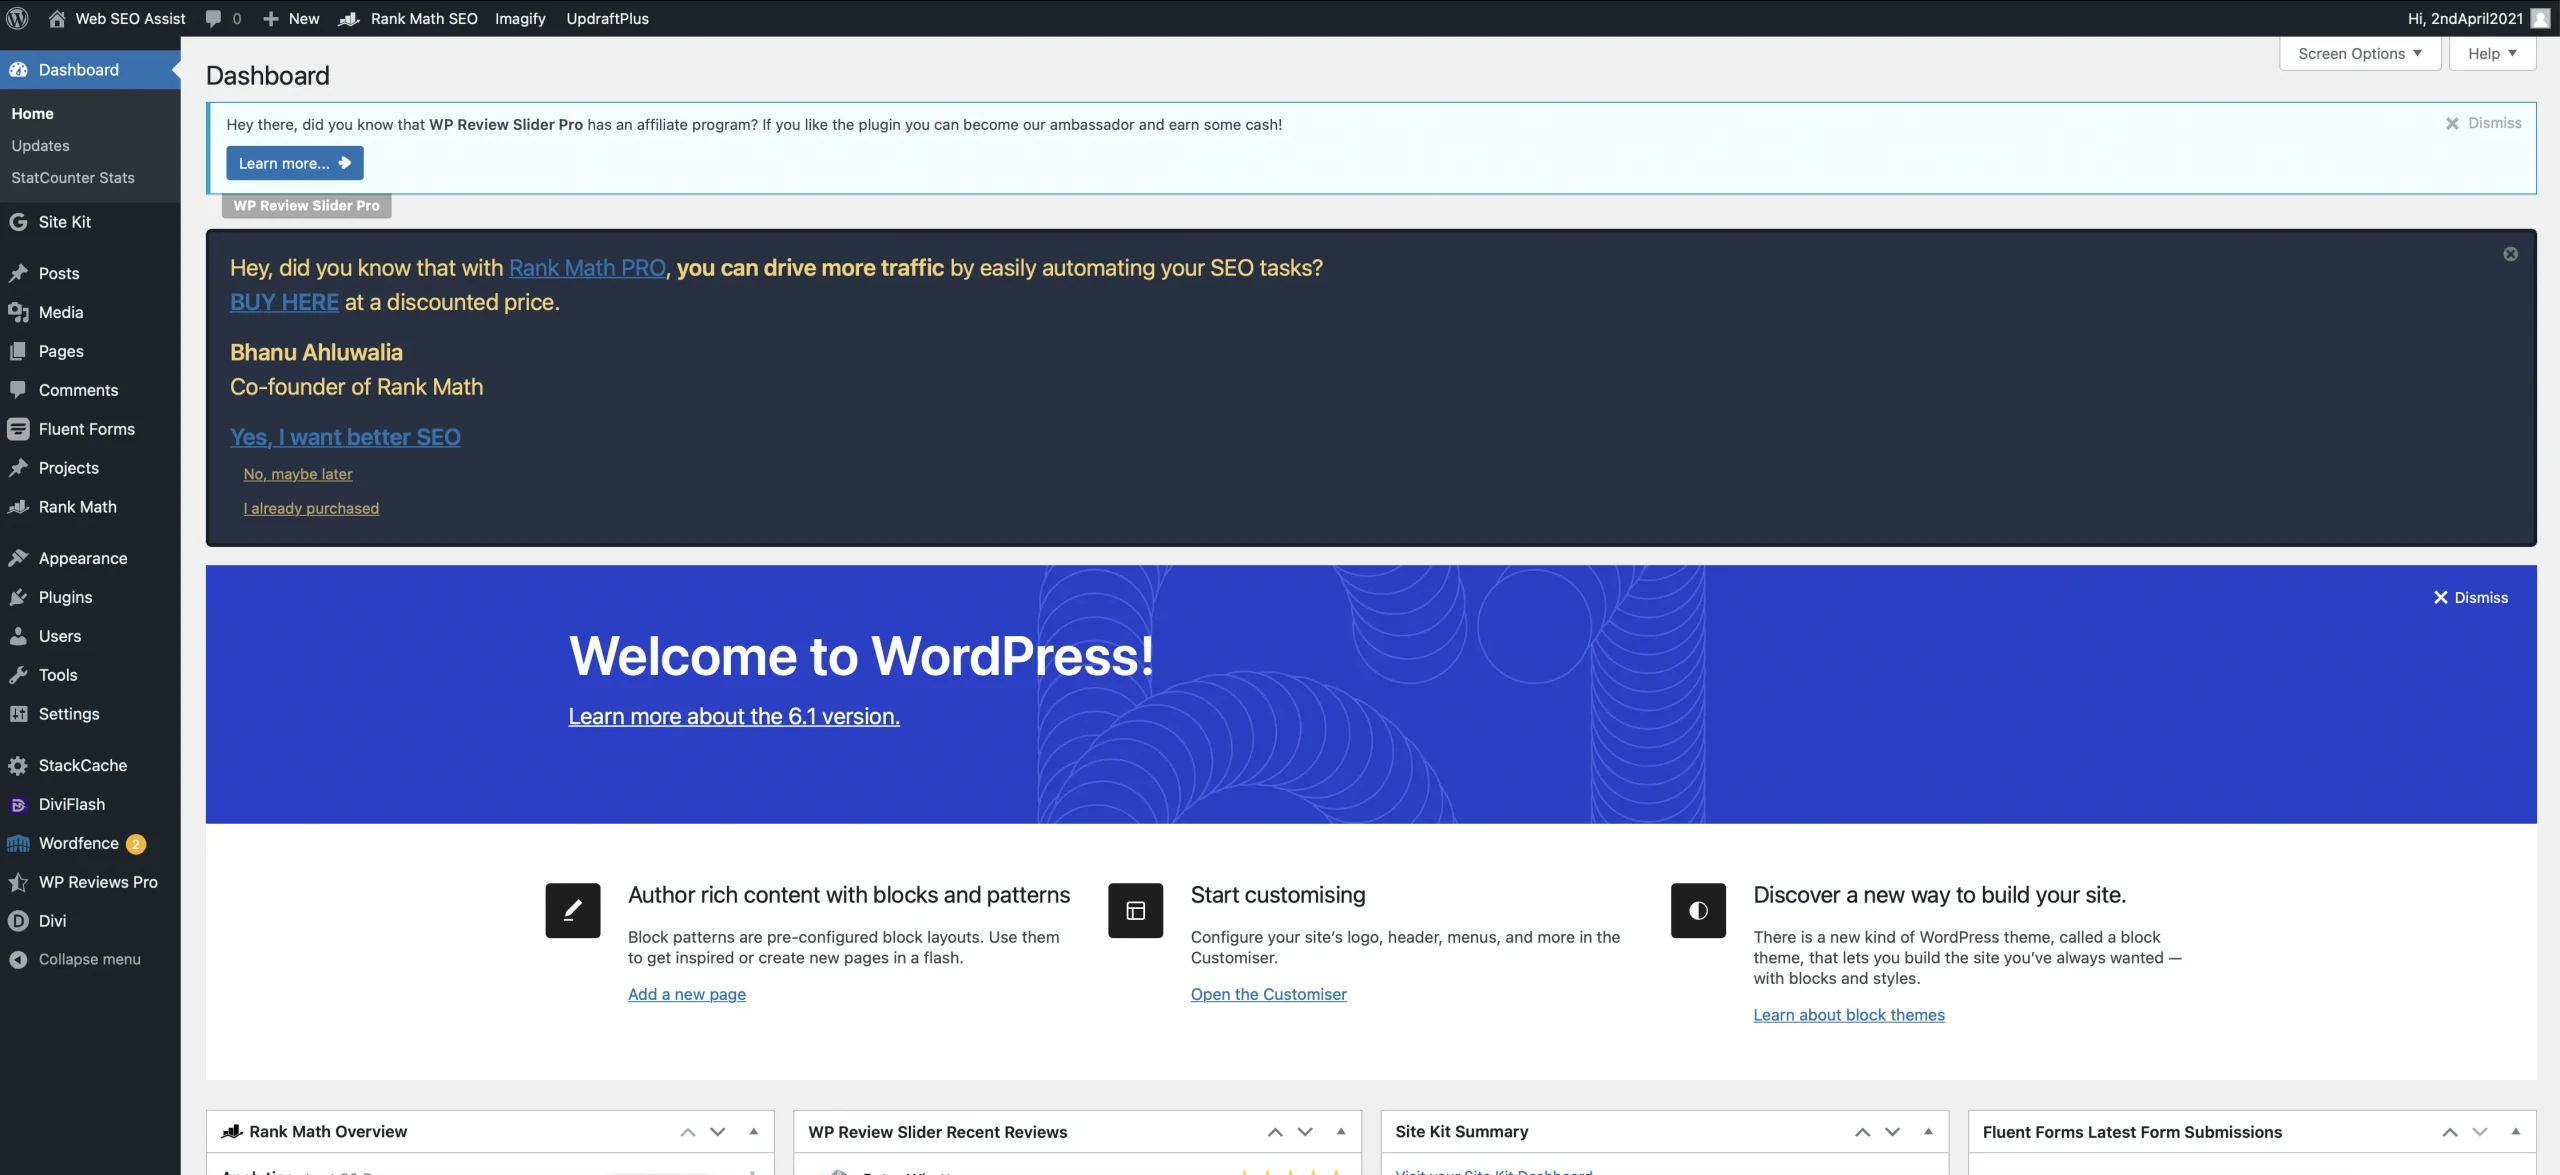
1. Log into your WordPress website using the Username and Password I’ve given you and navigate your way to the Dashboard. It should look like this:

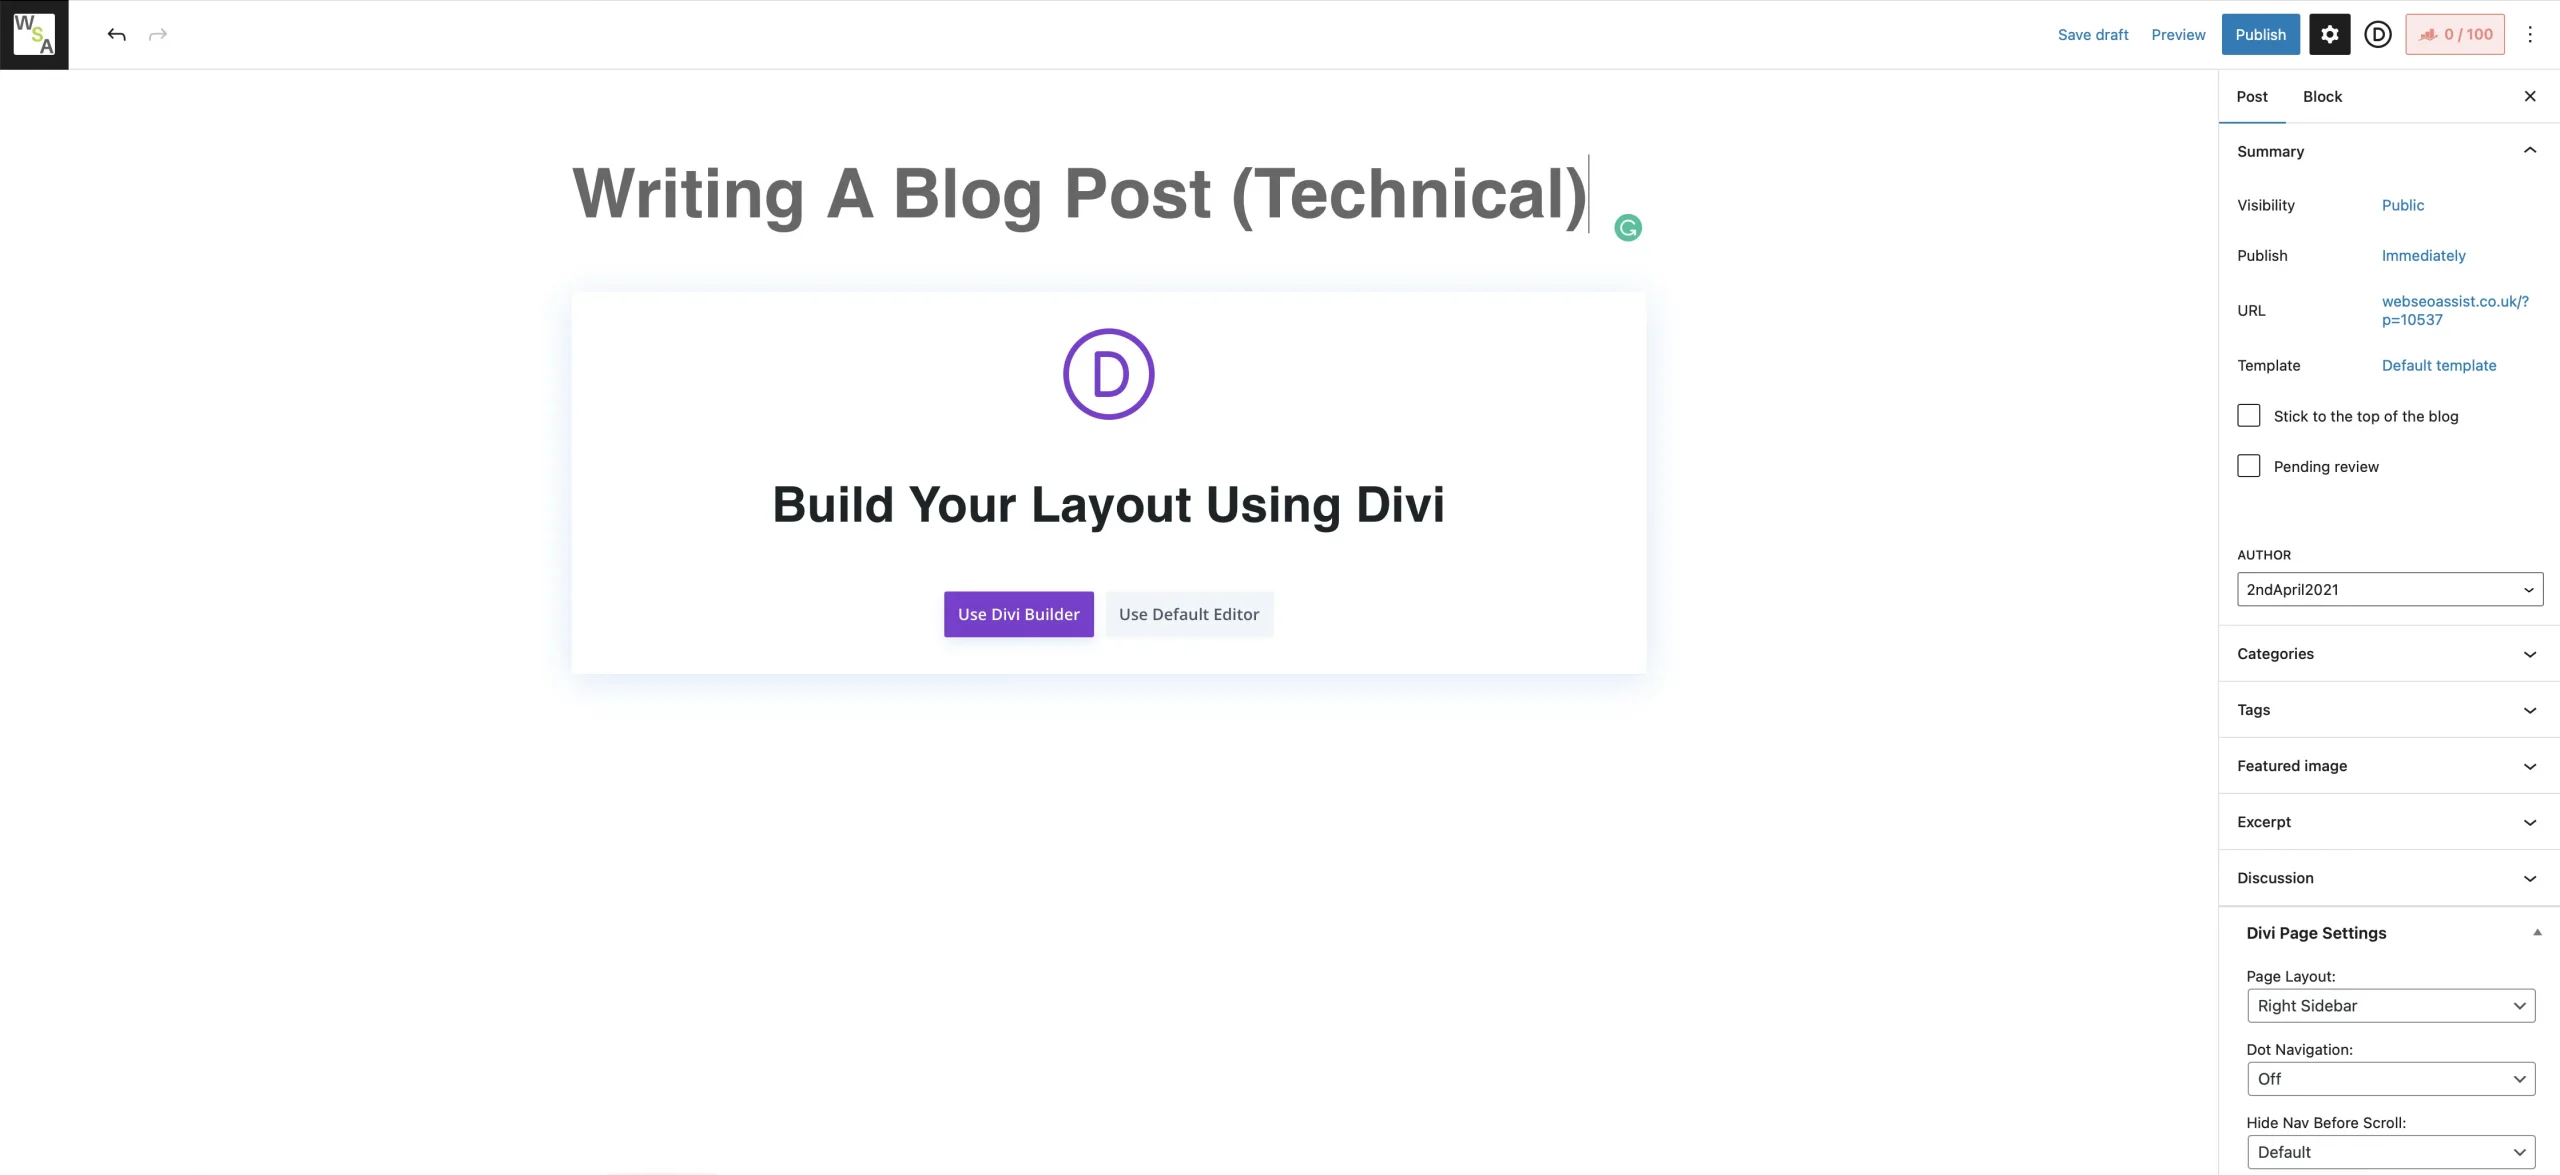
2. From the left-hand menu, select Posts and then Add New. You should see a screen that looks like this (though it will say “Add Title” at the top):

3. Give your Blog post a title bearing in mind the advice given in my Blog posts above. Click “Use Divi Builder”. We’ll come back to this page later.

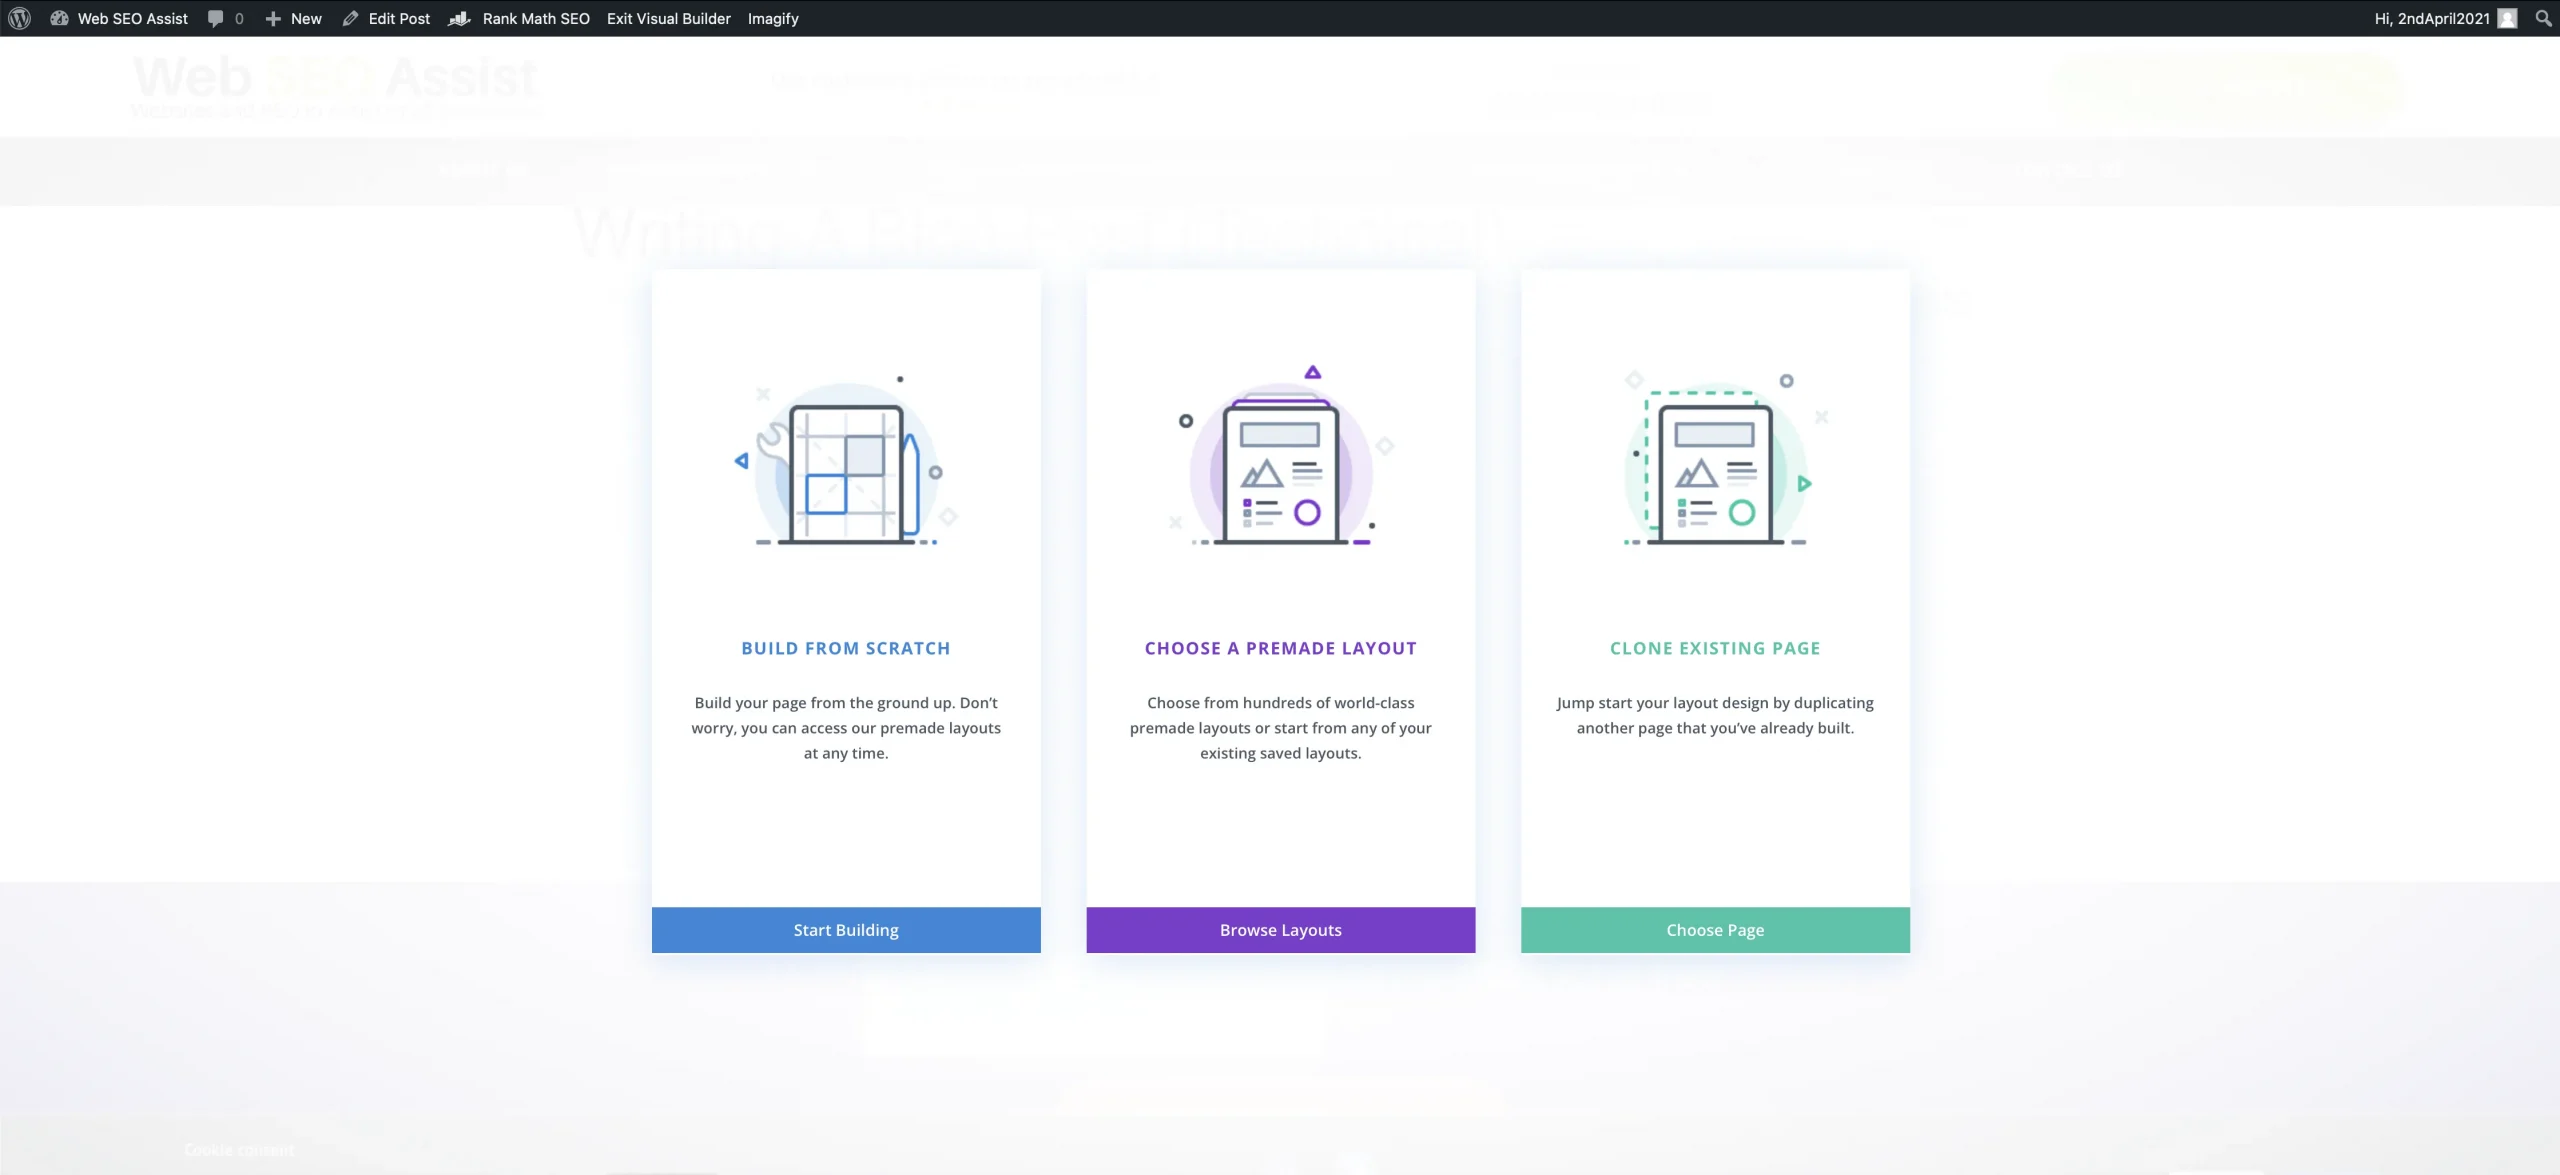
4. This next page you will want to select one of two options. If you want to clone a previous Blog post, then click the green “Clone Existing Page” Choose Page button. This will then let you scroll through to find one of your previous Blog post that you like the look of and will create a clone for you. Or, click on the blue “Build From Scratch” Start Building button. This will give you a blank page.
If your website is set up to have a standard Blog post layout, then the basic page will be laid out for you and things like headers, footers and image frames will be preset for you.
5. You should see a green circle with a white plus sign in it. If you hover your mouse pointer around it, you should see a Blue box appear. Blue is a Section, Green is a Row. If you click the Green circle, a pop-up box will appear offering you the chance to “Insert Row” and various green blocks below. The green blocks represent the divisions of the row. Chances are, you’ll want the first, full-width block. Click that. You’ll now see another pop-up box offering the chance to “Insert Module”. You can scroll down or type in the search box “Text” to add a text box. Or, perhaps “Image” to add a photo. Click the “Text” box and it inserts a box for you with some basic content text and a new pop-up box opens where you can edit the text.
When you’ve written your text, click the green button with a white tick and then, at the bottom of the page, you will see a purple circle with 3x white dots in it. Click that and on the right-hand side, you should see a double button offering “Save Draft” and “Publish” click whichever is appropriate at this point.
6. Once you’ve done that you can click “Exit Visual Builder” in white writing on the black row near the top and you will see your Blog post as it will be.
We need to do a bit of work to tidy it up. If you click the “Edit Post” in white writing on the black row near the top. We get back to the screen we saw earlier.

7. This time, we’re going to make some changes on the right-hand side. Can you see where it says “Publish” and “Immediately”? Assuming you haven’t clicked Publish previously if you click on the blue “immediately” text, you’ll see a calendar pop-up and Time. Here you can set your Blog post to publish at a future date and time (That’s how you store up Blog posts to self-publish at a later time/date).
Categories – Tick the boxes that apply to your post category.
Featured Image – If your website has a section that shows recent Blog Posts, then this is where you add an image to feature on this. It will probably need to be a specific size (or it will cause the preview section to misalign) I will have specified a specific size in the website docs you’ll have been sent…
Excerpt – Your website may automatically pull the first 20 words from your Blog posts to use in the preview. But, if it doesn’t, this is where you will need to add some text to entice readers to click to read.
You need to click “Publish” in the blue box at the top to save these settings.
8. Once you’ve done that bit, the next thing to do is to set up your Blog posts for SEO. To do that, on the same page, at the top of the right menu column, you should see a light red shaded box with a number out of 100 (possibly 7/100). Click that and you’ll see the SEO menu under the title Rank Math.
The first thing you need to do is to add your Keyword or Key Phrase to the box in the middle of the menu.
Near the top, still on the right side, under the heading “Preview”, click “Edit Snippet” in the light blue button. A new pop-up box opens in the middle of the page. The only bit you probably need to edit is the last one, “Description”, In here you need to write a compelling explanation/reason for your Blog post in 160 characters, including spaces.
You need to read the Blog post re SEO for this.
In the right-hand column of the page, you will see some red circles with white crosses and a description of each. Your mission is to change these to green circles with white ticks by writing good SEO content in your blog. It tells you the basics of what you need to do.
Be warned – this can be both addictive and frustrating!
Don’t forget to click the blue Publish button at the top to save your work.
The idea is to get the red shaded box at the top to change to green – this is done when you “score” 80/100 in the box.
Finally
If you get stuck or this all seems way too complicated and time-consuming, you can always ask me to do this for you. I offer Maintenance and Support packages that include a time allowance each month if you are adding Blog post etc. regularly or, if it’s just a few once in a while, buy a “Bucket of Time” 1hr of my time that you can carry forward for the next 6 months so I can do any extra work on your website for you.
This article is here to help you create a Blog Post.
Please get in touch with me if you need help or have feedback or suggestions.
Writing a Blog Post (Technical) is an article written by Stephen Davies of Web SEO Assist.


Recent Comments